Showing posts with label use. Show all posts
Showing posts with label use. Show all posts
Monday, April 17, 2017
Why Should You Use Facebook Lite on Android Phone
Why Should You Use Facebook Lite on Android Phone

Reasons & Benefits of Using Android App Facebook Lite:
You can use all the three apps – Facebook, messenger and Lite on any android device. You may have the faster internet connection with the latest android devices but the reasons are many to download it.
Actually, Lite means something with lightweight feelings. The app takes up to 195 MB with forcefully installed messenger to messaging. Facebook Lite is only 1 MB and after installed its size is 2.82 MB. I am sure you are going to delete the app and will download the lite version. You won’t have to use differently another app like messenger in this version of the app.
Let’s not wasting your time, I am going to tell you guys about those solid reasons to download Facebook Lite on your Android phone now.
Diminish Your Data Usage:
Sometimes, you recharge your phone and it gets damped faster. Most of our phone’s data is used for apps. One of the bigger data suckers is Facebook app. Everyone already knew it and searching how to deal with it. Well, the solution is downloading lite. As it is very light to use and use very data of your phone. You can even use it on 2G network coverage very easily. If you’re not sure about it then compare the stats with your present and earlier data usage after installing the app.
Saves Your Battery Power:
Battery life may depend on so many things like screen light, Bluetooth, Wi-Fi, data usage, Music, Gaming, NFC and many more. But one thing we already may know that facebook is one of a battery drainer culprit. Else, there are other many apps that kill phone’s power. Gladly, Lite is not at a battery drainer app. You can easily run your phone for more duration while it has installed the lite app. Actually, facebook lite was designed too lightweight to chew battery power and data.
Improve Your Experience:
What makes your experience better? Indeed, faster speed, easy to access, less data usage, full functionality and much more. Actually, all these qualities are included in this app. You can access facebook lite anywhere from any low internet coverage. It works smoothly even with 2G coverage. You can also do every access like you do on desktop site or Facebook app. There is nothing you can’t access like managing pages, groups and other things.
Its 1 MB size really matters:
No one can imagine an android app’s size within 1 MB. It is actually a fantasy for me. A social networking app within 1 MB size is kind of an impossible thing for me. But it’s not a matter of surprise that the lite version is less than 1 MB. So, it won’t occupy much space on your phone and ram. Even after installing, this app requires only 2-3 MB in size.
Less Cache Data:
Every android app has some cached data stored on the phone. It requires much space of the phone and speeds up the performance of the app. In this way, it saves your phone’s data and data usage. But cached data has some negative aspects also. It increases system memory and causes hang problem. So, sometimes it is needed to delete those cached data time to time. If I talk about lite then it creates less cached data. You can check it by going to the App info section.
So, it will be a good choice if you move on to Facebook lite app. It is really worth of replacing the original app.
Available link for download

Saturday, February 25, 2017
Why Use Password Managers and How to Do It
Why Use Password Managers and How to Do It

Most of the people often use quite weak passwords and then reuse those passwords on various websites. It is quite tough to use strong and unique passwords on various sites. So, to ease the process, you can use a password manager.
These password managers keep your login information for every website you usually use and also helps you in logging in them automatically. These managers encrypt your password database using a master password-the master password is the only password you have to keep in mind.
Never Reuse Passwords
Password reuse is a significant problem as many password leaks occurs even on large websites. When there is password leak, the illegal individuals have an email id along with the username as well as password combination which they can use for other websites. In case you use the same login information at all sites, any leak at one website could lead to people accessing your all accounts. In case someone gains access to your email account then they can easily use the password-reset feature to access different websites like in the case of your online banking account.
In order to prevent password leaks from getting it to more damage, you have to use the unique passwords on all websites. These passwords should be quite strong, long, unpredictable which also contain both numbers and symbols.
Web addicts have a large number of accounts to keep the track while the ordinary person may have about tens of various passwords. Remembering such tough passwords can be quite challenging. The best way is to use a password manager which generates both secure and random passwords for you and also keeps in the record in case you don’t recall them.
How Using Password Manager Feels Like
The password managers will take off quite a load which will certainly reduce stress on the brain which can be used in other productive work rather than remembering different passwords.
Whenever you use a password manager and wish to get into a website, you have to visit the website normally. Instead of typing in the passwords on that website, you have to type your master password into any of the password manager you use, which then automatically fills all the appropriate information on that website. In case you have already logged into the password manager, then it will fill the data all by itself.
If you are creating any new account, your password manager will provide an option to generate a secure random password for your use and then you don’t have to worry about that password anymore. It can be easily configured to fill the information automatically.
Why You Shouldn’t Use Browser-Based Password Managers
Web browsers like Firefox and others, they all come with integrated password managers. Each of these browsers has in-built password manager which won’t compete with the dedicated password managers. These managers keep your password in the unencrypted form. People can easily access any password files on your computer unless you have encrypted your hard drive.
Mozilla Firefox comes with a master password feature which offers you the ability to encrypt your saved passwords with one master password, storing those passwords in an unencrypted format. However, this ain’t a good solution. The interface doesn’t result in generating random passwords and it lacks different features such as cross-platform syncing.
Password Managers to Use
There are a huge variety of password managers which are available, but only three of them stands out as the great options. Each of these are quite an impressive option and which will make you trust those managers.
Dashlane
This password manager is quite new, but it comes with great features and is a slick app for all the platforms such as Windows, OS X, iPhone, Android, and others. They have extensions in different browsers and feature like a security dashboard which analyses your different passwords, and they even come with an automatic password changer that can be used to change various passwords for you.
One of the significant features of Dashlane is that it is entirely free to use on any single device. In case you wish to sync your passwords between different devices, then you have to upgrade to premium version. However, you can test this manager for free.
In terms of security, it also has another advantage as you can choose to keep all your passwords locally on your own computer instead of on a cloud.
LastPass
This is one of the cloud-based password managers which comes with extensions, mobile apps and even comes with desktop apps for every browsers and OS you wish to use. It is quite a powerful application and also provides variety of two-factor authentication option which ensures that no one can login into your password vault. LastPass stores your different passwords on its server in an encrypted form. LastPass couldn’t even see your passwords even if they wish to.
KeePass
LastPass isn’t fit for everyone. Few people aren’t comfortable with a cloud-based password manager and it is understandable. This password manager is quite a popular desktop application to keep your passwords in managed fashion. It also has browser extensions along with mobile apps for KeePass. This password manager keeps your passwords on your own computer which means that you have the control of all of them. Even though this is an open-source application, so can still edit and audit its code in case you wish to. The only downside is that you remain to be responsible for your different passwords, and it is you have to sync them between different devices, you have to do it manually.
How To Get Started With Your Password Manager
The major decision which you have to take in case of a password manager is selecting your master password. This master password has controls to access your complete password manager database, and this master password should be strong as it is the only password that you will require to remember. You may wish to write down your password and then keep it safe after selecting it, in case you get stuck in situations like you are quite serious, and you may wish to keep your password in your bank vault.
After installing any password manger, you have to start changing your website passwords with a more secure password. Password managers also provide you the ability to store different types of data in a secure format such as credit card numbers to secure notes. Every data being stored in a password manger are encrypted with a master password.thanks for visit Sumit Bot
Available link for download
Friday, February 17, 2017
Steps By Steps How To Use iOS 8 3 iCloud Activation Lock Bypass 2016 update
Steps By Steps How To Use iOS 8 3 iCloud Activation Lock Bypass 2016 update
Tutorials On How To Use iOS 8.3 iCloud Activation Lock Bypass (2016 update)
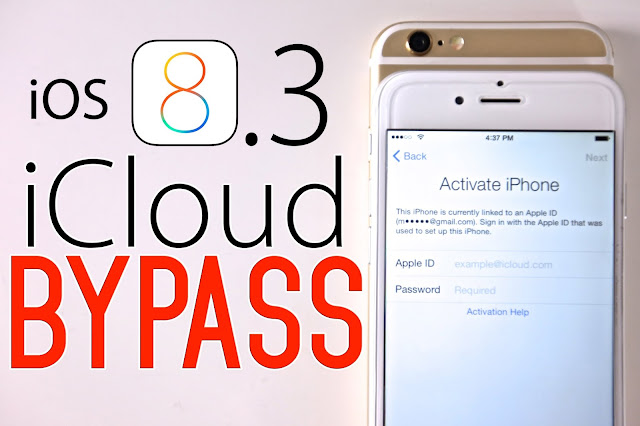
Steps By Steps How To Use iOS 8.3 iCloud Activation Lock Bypass (2016 update)
iCloud Activation Lock Bypass Server is very useful method for those who have iCloud Activation Locked device.
Many people has iCloud Activation Lock because they bought locked devices or because they accidentally activated the lock.When an iPhone (or other iDevice) is locked you’ll see a message like the one in the image, requesting Apple ID and Password.

This method will permit you to unlock some of the main iOS device features (it will not unlock all the iOS features, only the main features).
It will work on iOS 7.0 up to iOS 8.3. It was not been testes on iOS 8.4 beta yet but it should also work fine with iOS 8.4.
iCloud Activation Lock Bypass Server Method
To iCloud Lock Bypass using a Server, follow these steps to get back the main functionalities of your iDevice:
- Reset you device.
- “> Slide to set up” under “Hello screen”.
- Select your language and country.
- Choose you local Wifi network; Tap Next.
- When you get the “Activate iPhone Screen” tap Home Button once.
- Tap Wifi settings (check Image 1).
- Tap the “i” icon corresponding to your Wifi network (check Image 1).
- Tap DNS Server field > Select All > Delete the IP you have in this field > Paste the IP from one of the iCloud Activation Servers you see bellow. For example: “78.109.17.60“.
- Tap Back > Done.
- Tap Activation Hello.
- Tap “Menu“.
- You are done. Now you have access to the main iPhone functionalities (Email, Maps, Social, Internet, Videos, Music, SMS etc.).

iCloud Activation Lock Bypass DNS servers
- 78.109.17.60
- 78.109.17.61
Conclusion: We’ve tested some features like playing youtube videos with device after bypass and the result amazed us because everyone knows that unlocking a iCloud locked iPhone is something very difficult because of Apple security standards but with this method any iCloud locked iPhone can be used to do something with, mainly for those who have accidentally locked the device or bought an iPhone not knowing that the device was iCloud locked.
Subscribe our email news for more of updates regarding to new servers for this method and new methods.
Do Not Forget To Share
Contact Ours for bypassing your iOS Apple At No 1 Opposite Transformer Kudan,Nigeria At Price Of N28,000 Only
09030979422
Next Page
Available link for download
How To Change and Use Fonts In Blogger Posts
How To Change and Use Fonts In Blogger Posts

For your blog to look amazing, your blog should have user friendly template which blogger allows users to upload third party templates. Your content and fonts should also be eye friendly so that visitors should not face any problem while reading your blog. So here we come with an awesome post discussing about how to change fonts in bloggers posts.
How To Change and Use Fonts In Blogger Posts.
We will discus step wise to change fonts.
Step 1 - Remove Existing Font
-The very first step is to remove the existing font so that you can change it to your favourite font.
-Go to Blogger -- Template -- Edit HTML
- Now press CTRL+F and search for the code " fonts.googleapis.com "
You will find the code as shown in Screen shot. remove the link that is highlighted by red box and save template.

Step 2 - Install New Font In Your Blog
-First of all go to Google Fonts and choose the font that you want to use and then click on " Quick Use "
- Now tick all the styles. After copy copy the HTML link tag code. ( You will find that code below the heading written on no- 3 " Add this code to your website " )
- Now again Go to Blogger -- Template -- Edit HTML and paste that code below <head> and save the template.
- After that come to no-4 ( Integrate the fonts into your CSS ) in Google Fonts, You will see a code like as shown in screen shot. Copy that code

- Now again Go to Blogger -- Template -- Edit HTML and search for body {. There you will see a code like font-family upto semicolon. Remove that code and paste the new code that you have copied from Google fonts and save template
Now you are done with your work. You can use your favourite fonts in blogger fonts.
Available link for download
Tuesday, February 14, 2017
Pokemon Go Bot Auto Play Game Capture Evolve Transfer Use Eggs Incense
Pokemon Go Bot Auto Play Game Capture Evolve Transfer Use Eggs Incense
Pokemon Go is dominating currently and so many users are finding some hacks and tricks for it. as i have already uploaded one for joystick hack here you can get it Pokemon Go Joystick Hack.This game is kinda a lot of work if you want to reach the higher level or get some high level pokemon. Need a lot of grinding as well but using pokemon go bot you can easily farm for it. Its simple easy to use just a PC is required that’s it.
Requirements:
Google or PTC (Pokemon Trainer Club) Account
A PC Running on Windows
And Pokemon Go Bot Which you can download from below
Google or PTC (Pokemon Trainer Club) Account
A PC Running on Windows
And Pokemon Go Bot Which you can download from below
Instructions:
1) First of all download the POKEMON GO BOT FROM HERE
POKEMON GO BOT FIXv2 ANTI-BAN BAN-REMOVAL
2) Once download is finished open it using winrar or winzip
1) First of all download the POKEMON GO BOT FROM HERE
POKEMON GO BOT FIXv2 ANTI-BAN BAN-REMOVAL
2) Once download is finished open it using winrar or winzip
3) Go to unzipeed folder and start the application using PokemonGo.RocketAPI.Console.exe file
4) Now you will GUI TAB and the CMD TAB, In GUI TAB select Google/PTC and write down your ID and Password
5) That’s It its done. Now your Profile will be logged in there and your pokemons will appear in GUI TAB and in CMD TAB you will see what’s happening in there
6) Entire Instructions Video will be added asap.
There are some various options like Lower CP TO Transfer/Evolve particular pokemons/Skips capturing some pokemons etc etc. You can put Eggs in the incubators as well and those EGGS will be hatched automatically. The problem is you have to manually place eggs in incubators. One more problem i have found is that some pokemons are not transferring automatically so you can easily transfer them using GUI TAB. its easy and requires no hard work. you are reading this on Andropalace.net .Its easy and Ban-free. Try it.
Enjoy the Bot until it lasts. this is the v2 BOT, v1 were blocked by the NIANTIC before..
Available link for download
Friday, January 20, 2017
How To Use Glo Bis On Android And PC
How To Use Glo Bis On Android And PC
Many of my friends and co-bloggers has been asking me how its possible to use Glo Bis on Android smart phones.
Well, this is possible if you can tweak your Androids smart phone IMEI number to that of blackberry, this is simply done using Mobile Uncle or MTK Engineering app.

Install mobile uncle or MTK engineering app from google playstore. After you have installed the app, look for a blackberry phone and write the IMEI number somewhere because you will be needing it later on. Make sure the blackberry IMEI number you want to use glo sim card will not be used inside at all.
Well, this is possible if you can tweak your Androids smart phone IMEI number to that of blackberry, this is simply done using Mobile Uncle or MTK Engineering app.
Install mobile uncle or MTK engineering app from google playstore. After you have installed the app, look for a blackberry phone and write the IMEI number somewhere because you will be needing it later on. Make sure the blackberry IMEI number you want to use glo sim card will not be used inside at all.
Launch the app as seen in the picture above.

Click on Engineer Mode (MTK)

Slide your screen to the left to see "Connectivity" under it, click "CDS Information".

Then Radio Information.

You will then see Phone 1 and Phone 2, Phone 1 is the IMEI number of the SIM 1 while Phone 2 is the IMEI number of SIM 2. But in this article we will be using the SIM 2...so click phone 2.
After you press phone 2, you will see your current IMEI number, your phone number and more.

In the space you see AT+, just type E in it, it will bring up some options for you select the second option that has 10 in it.

Now type in your blackberry IMEI number I told you to write it down before, dont copy and paste it as the app will close if you do that. Write it in between the quotes as seen in the image above.
Now, after all that press "Send AT Command".
Type *#06# on your phone to see if your IMEI has been changed, if it did not change you will have to reboot your phone and check it again.
After the IMEI number has been successful changed, Load Glo 1000 on your glo sim card and send Comonth to 777 to activate the Glo Bis on your Android smart phone.
After you have been activated, go to mobile networks on your smart phone to change your APN settings.
APN:Blackberry.net
Name:GLO BIS
You can also use this on your PC by just tethering it.
Now enjoy your browsing with the Glo super fast connection.
Do you have any questions, or you encounter any challenges while doing this? Let me hear from you in the comment box.
Disclaimer:Remember to back up your IMEI before doing this as I wont be held responsible for anything that happens to your device after you change your IMEI number.
Available link for download
Thursday, January 19, 2017
Disa Use o Whats Telegram Face e SMS em um único app!
Disa Use o Whats Telegram Face e SMS em um único app!
 Agora será possível você utilizar o Facebook,Whatsapp, Telegram e SMS em um único App e obter mais Memória e tempo de Bateria, já que gastará menos espaço e menos memória RAM gasta!
imagens:
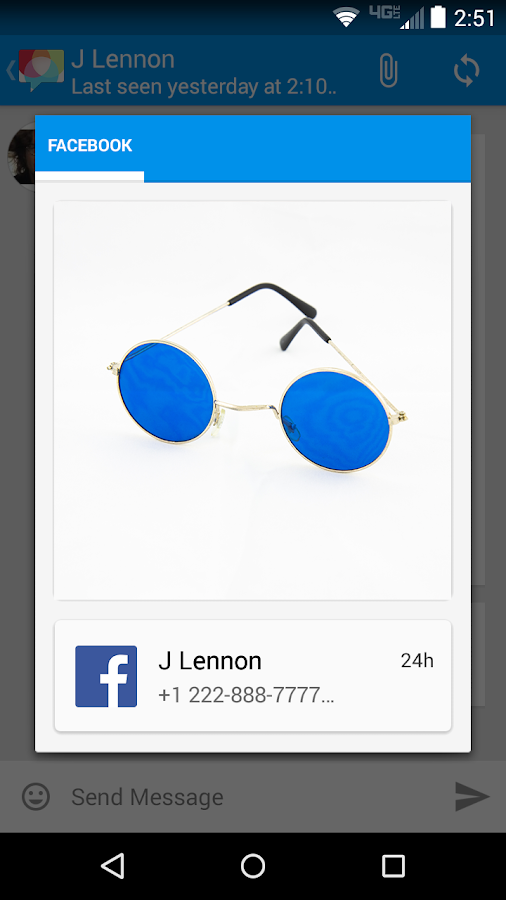
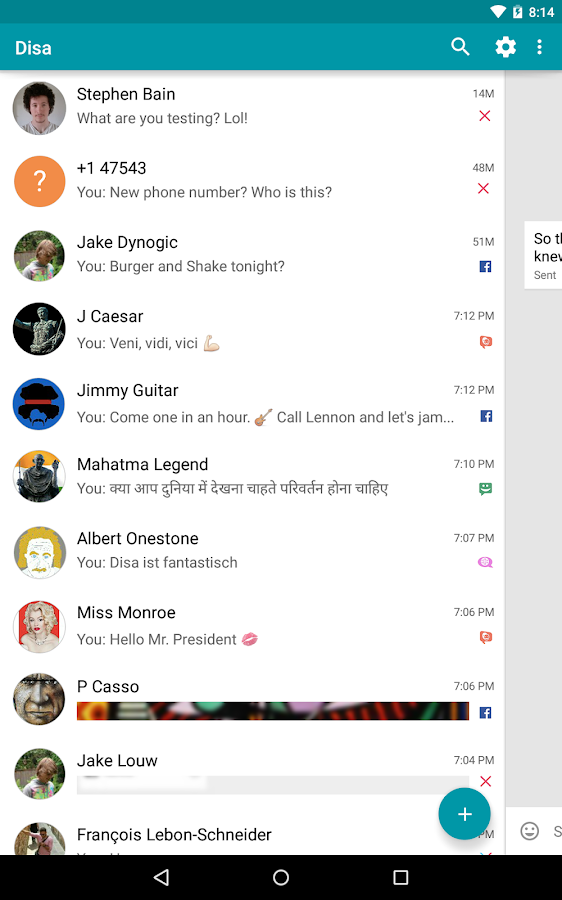
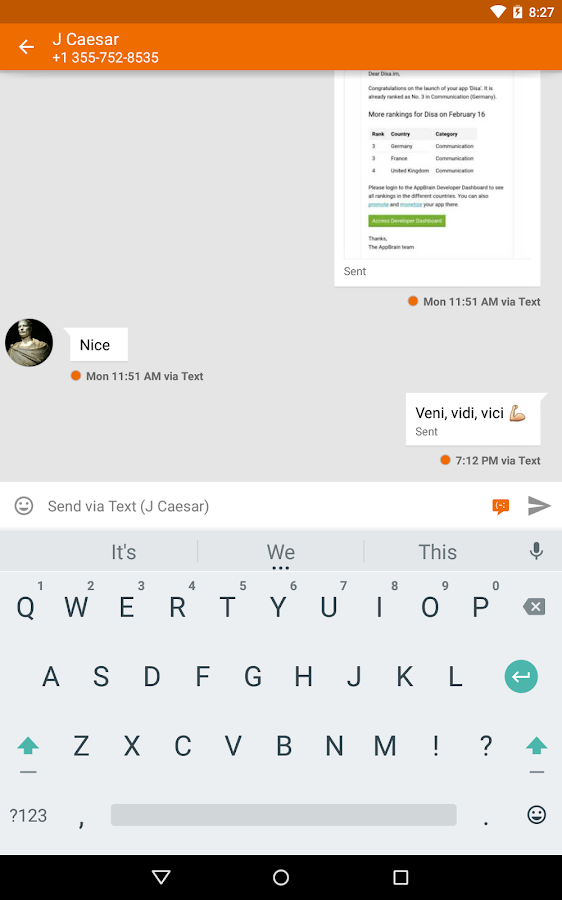
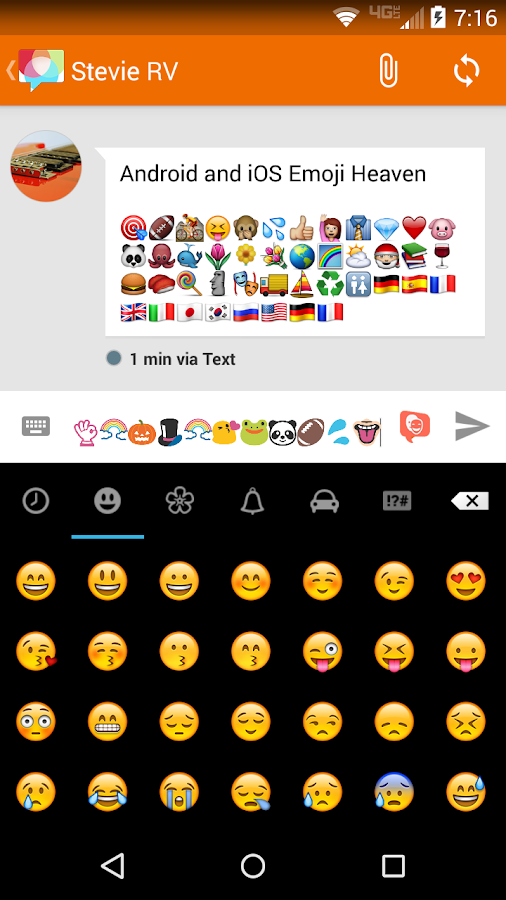
O Disa conta com opções de Plugins, e compatibilidade com diversos aparelhos!
É uma central de comunicação que reuni serviços de mensagem e de até ligação...
Além de função ele é experiente em Designer e atualizações!
É um app esperados por muitos, então baixe e experimente!
Veja o vídeo de demostração do app aqui: Vídeo
Clique abaixo e faça o Download do apk Dise agora:
baixar
Available link for download
Subscribe to:
Posts (Atom)