Showing posts with label windows. Show all posts
Showing posts with label windows. Show all posts
Wednesday, April 5, 2017
How to Create Windows 10 Technical Preview Bootable USB Flash Drive
How to Create Windows 10 Technical Preview Bootable USB Flash Drive

After not getting expected response from the users to Windows 8 / Windows 8.1, Microsoft is going to launch Windows 10 on 29th July 2015 to give better and amazing experience to users. However, if you want to have the glimpse of Windows 10, then you can download Windows 10 Technical Preview that has already launched by Microsoft. Windows 10 Technical Preview is free of cost for all the users which you can install on your computer by using USB Flash drive. Now we will discuss how you can install Windows 10 Technical Preview on your computer using USB Flash drive.
You can also Create Windows 8.1/8 or Windows 7 Recovery Disc or Drive for installation of Windows 8.1/8 or Windows 7 on your PC or Laptop.
How to Create Windows 10 Technical Preview Bootable USB Flash Drive For Installing
Requirments For Creating Windows 10 Technical Preview Bootable USB Flash Drive
You must have USB Flash Drive ( atleast 4GB for 32 bit version )
Download Windows 10 Technical Preview
Download Rufus
Steps For Creating Windows 10 Technical Preview Bootable USB Flash Drive

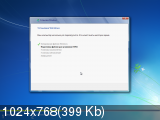
Step-1. First of all insert USB Flash drive to your PC.
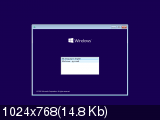
Step-2. Now install and run Rufus on your PC. You will see a pop-up Window on your screen.
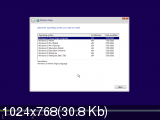
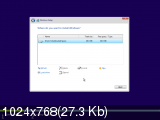
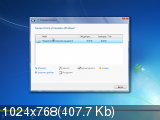
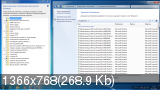
Step-3. Select your USB drive from "Device" as shown in the screen-shot.
Step-4. Select “MBR partition scheme for BIOS or UEFI computers” from "Partition scheme and target system type".
Step-5. After that, select "File system" as "NFTS".
Step-6. Keep Cutler size as 4096 ( default ) and under "Format options" select last three options and remain the first option "Create device for bad blocks" as unselected, as shown in the screen-shot.
Step-7. After that click on "Start" and your processing will start and may take few minutes to create bootable USB Flash drive.
Now you are done with your work and you can safely remove your USB drive to install Windows 10 Technical Preview on your Pc or Laptop.
Available link for download
Tuesday, March 28, 2017
Windows 10 Version 1607 with Update x86 x64 AIO 32in2 Free Download
Windows 10 Version 1607 with Update x86 x64 AIO 32in2 Free Download

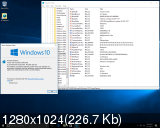
Windows 10, Version 1607 with Update (x86-x64) AIO [32in2] adguard
Software Version: 10.0.14393.693 / v17.01.11
assembly Author: Adguard
Language: English, Russian
assembly Author: Adguard
Language: English, Russian
Legalization: require activation!
(for personal testing, use alternative means of activation)
(for personal testing, use alternative means of activation)
System Requirements:
* Processor: 1 gigahertz (GHz) or higher.
* RAM: 1 gigabyte (GB).
* Free space on hard drive: 16 gigabytes (GB).
* Graphics card: graphics device Microsoft DirectX 9 or later.
* Additional requirements to use certain features.
* To use the touch features require tablet or monitor that supports multitouch.
* To access the Windows Store to download and run applications that require an active Internet connection and a screen resolution of at least 1024 × 768 pixels.
Description:
The assembly is made on the basis of the original image from MSDN. Languages have been integrated: English, Russian, and updates on January 10, 2017, together with the application MetroUI (10/01/2017). The distribution included Net Framework 3.5 (includes .NET 2.0 and 3.0). The system is fully on the original installer. Possible to establish from under the BIOS, and out of the system.
The assembly is made on the basis of the original image from MSDN. Languages have been integrated: English, Russian, and updates on January 10, 2017, together with the application MetroUI (10/01/2017). The distribution included Net Framework 3.5 (includes .NET 2.0 and 3.0). The system is fully on the original installer. Possible to establish from under the BIOS, and out of the system.
Checksums:
ru_windows_10_rs1_14393.693_with_update_16in1_x64_v17.01.11_by_adguard.iso-en
the CRC-32: c8da8857
the MD4: 1e44d8e6d931b7161aad2f9228eec6cf
the MD5: ffa830115a42e5cfeec39248e1eba9b3
the SHA-1: 512301ce6aa001e604a9c3b8a4bda86a225d8744
the CRC-32: c8da8857
the MD4: 1e44d8e6d931b7161aad2f9228eec6cf
the MD5: ffa830115a42e5cfeec39248e1eba9b3
the SHA-1: 512301ce6aa001e604a9c3b8a4bda86a225d8744
ru_windows_10_rs1_14393.693_with_update_16in1_x86_v17.01.11_by_adguard.iso-en
the CRC-32: 3c5b5fbe
the MD4: 10ff51fa8d12f5520762cf8fec615b1e
the MD5: 26608974ddae0841bf60bd23754d79ac
the SHA-1: e0173d9bc829309e4f3109c3da0a8e57f355b33a
the CRC-32: 3c5b5fbe
the MD4: 10ff51fa8d12f5520762cf8fec615b1e
the MD5: 26608974ddae0841bf60bd23754d79ac
the SHA-1: e0173d9bc829309e4f3109c3da0a8e57f355b33a
Composition of assembly:
ru_windows_10_rs1_14393.693_with_update_16in1_x86_v17.01.11_by_adguard.iso-en
the Windows 10 Home Single Language (32-bit) - English
the Windows 10 Home (32-bit) - English
the Windows 10 Pro (32-bit) - English
the Windows 10 Pro VL (32-bit ) - English
the Windows 10 Education (32-bit) - English
the Windows 10 Education VL (32-bit) - English
the Windows 10 Enterprise (32-bit) - English
the Windows 10 Enterprise 2016 LTSB (32-bit) - English
the Windows 10 Home Single Language (32-bit) - Russian
the Windows 10 Home (32-bit) - Russian
the Windows 10 Pro (32-bit) - Russian
the Windows 10 Pro VL (32-bit) - Russian
the Windows 10 Education (32-bit) - Russian
the Windows 10 Education VL (32-bit) - Russian
the Windows Enterprise 10 (32-bit) - Russian
the Windows 2016 Enterprise 10 LTSB (32-bit) - Russian
ru_windows_10_rs1_14393.693_with_update_16in1_x64_v17.01.11_by_adguard.iso-en
the Windows 10 Home Single Language (64-bit) - English
the Windows 10 Home (64-bit) - English
the Windows 10 Pro (64-bit) - English
the Windows 10 Pro VL (64-bit ) - English
the Windows 10 Education (64-bit) - English
the Windows 10 Education VL (64-bit) - English
the Windows 10 Enterprise (64-bit) - English
the Windows 10 Enterprise 2016 LTSB (64-bit) - English
the Windows 10 Home Single Language (64-bit) - Russian
the Windows 10 Home (64-bit) - Russian
the Windows 10 Pro (64-bit) - Russian
the Windows 10 Pro VL (64-bit) - Russian
the Windows 10 Education (64-bit) - Russian
the Windows 10 Education VL (64-bit) - Russian
the Windows Enterprise 10 (64-bit) - Russian
the Windows 2016 Enterprise 10 LTSB (64-bit) - Russian
Main features:
- Integrated update on January 10, 2017;
- Updated application to build MetroUI release date (01.10.2017);
- Integrated NET Framework 3.5 (includes .NET 2.0 and 3.0);
- Integrate language packs: English, Russian;
- Cleaned folder: WinSxS ManifestCache and WinSxS Temp;
- The systems were not in audit mode.
All changes made by standard Microsoft tools.
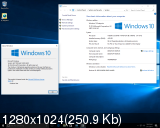
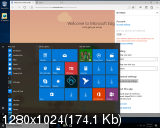
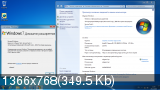
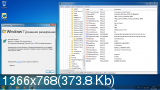
Screenshots:


Available link for download
Saturday, March 25, 2017
How to Create Cortana Reminders with Windows 10 Sticky Notes See How
How to Create Cortana Reminders with Windows 10 Sticky Notes See How
How to Create Cortana Reminders with Windows 10 Sticky Notes? See How
How to Create Cortana Reminders with Windows 10 Sticky Notes
While some people pepper their desks with sticky notes to remind them of upcoming appointments, Windows 10 makes it easy to create sticky notes on your desktop. Even better, Cortana will add these reminders to your calendar. That way you can still have the visual cue and have a more formal prompt to make sure you dont forget.
Heres how to create Cortana Reminders with Windows 10 Sticky Notes:
1. Open the Windows Ink Workspace from the taskbar.

2. Select Sticky Notes.

3. Write your reminder note, and be sure to include a date or time.

You can use a stylus and write your reminder or type it with the keyboard. If you write, you may have to try multiple times if you have messy handwriting.
4. Tap the time or date when it turns blue.

5. Tap "Add Reminder."

6. Correct any errors and click Remind.

7. Cortana will confirm the reminder and alert you prior to the event.

These Windows 10 Keyboard Shortcuts Will Save You Clicks

Any time you can hit a key combination instead of rolling your mouse pointer across the screen, you save a lot of time. Windows 10 has a long list of keyboard shortcuts that help you launch new features such as Cortana, navigate around the OS or organize your desktop layout with ease. While you might know some of the traditional Windows keyboard shortcuts, you will be surprised to find some new tricks below.
MORE: How to Create Keyboard Shortcuts in Windows 10
Cortana Shortcuts
Windows + Q: Opens Cortanas Home View, enables search by speech or keyboard input.
Windows + C: Opens Cortanas speech prompt
New in Windows 10
Windows Key + A: Opens Windows 10 notifications
Windows Key + I: Opens Windows 10 settings
Windows Key + Ctrl + D: Creates new virtual desktop
Windows Key + Ctrl + F4: Closes current virtual desktop
Windows Key + Ctrl + Left or Right: Switches between virtual desktops
Windows Key + F1: Opens Edge and Searches "How do I get help in Windows 10" with Bing (formerly opens Help)
Windows Key + Print Screen Key: Creates a screenshot of the whole screen in the Photos app. More screenshot key commands can be found here.
Windows Standards
Windows Key: Shows the Windows 10 Start Menu
Windows Key + L: Locks your Windows 10 device
Windows Key + Tab: Launches Windows 10 Task View
Windows Key + Enter: Opens Narrator, a program that reads text for you and shows you tips.
Desktop Commands
Windows Key + X: Opens Start button context menu
Windows Key + Left, Right, Up or Down: Moves the active window around on your screen. Left and Right snap the window to either side so it takes up half of the screen, Up and Down shrink the window to a quarter-size and move it to that corner. Once you have used Windows Key + Up to place it in the top corner, pressing that command again makes the window take up your whole screen. If you have hit Windows Key + Down to place a window in the bottom corner, hitting that command again minimizes the window.
Windows Key + D: Show Windows desktop (also available with Windows Key + M)
Windows Key + ,: Temporarily show desktop
Connecting and Sharing
Windows Key + H: Share content (if supported by current app)
Windows Key + K: Connect to wireless displays and audio devices
Windows Key + E: Open Windows Explorer
Traditional Keyboard Shortcuts
Windows Key + Space: Switch keyboard input language (if you have added at least a second one)
Windows Key + Shift + Left or Right: Move current Window from one monitor to another (when using a multiple monitor setup)
Windows Key + 1, 2, 3 and so on: Open programs that are pinned to task bar
Windows Key + R: Run a command
Windows Key + P: Project a screen
Alt + Tab: Switch to previous window
Windows Key + T = Cycle through screenshots of open apps
Alt + F4: Close current window, but if you perform this combination when viewing the desktop, you open Power dialogue to shut down or restart Windows, put your device in sleep mode, sign out or switch the current user.
Available link for download
Tuesday, March 7, 2017
How to Fix Error 0x80240014 in Windows Store
How to Fix Error 0x80240014 in Windows Store
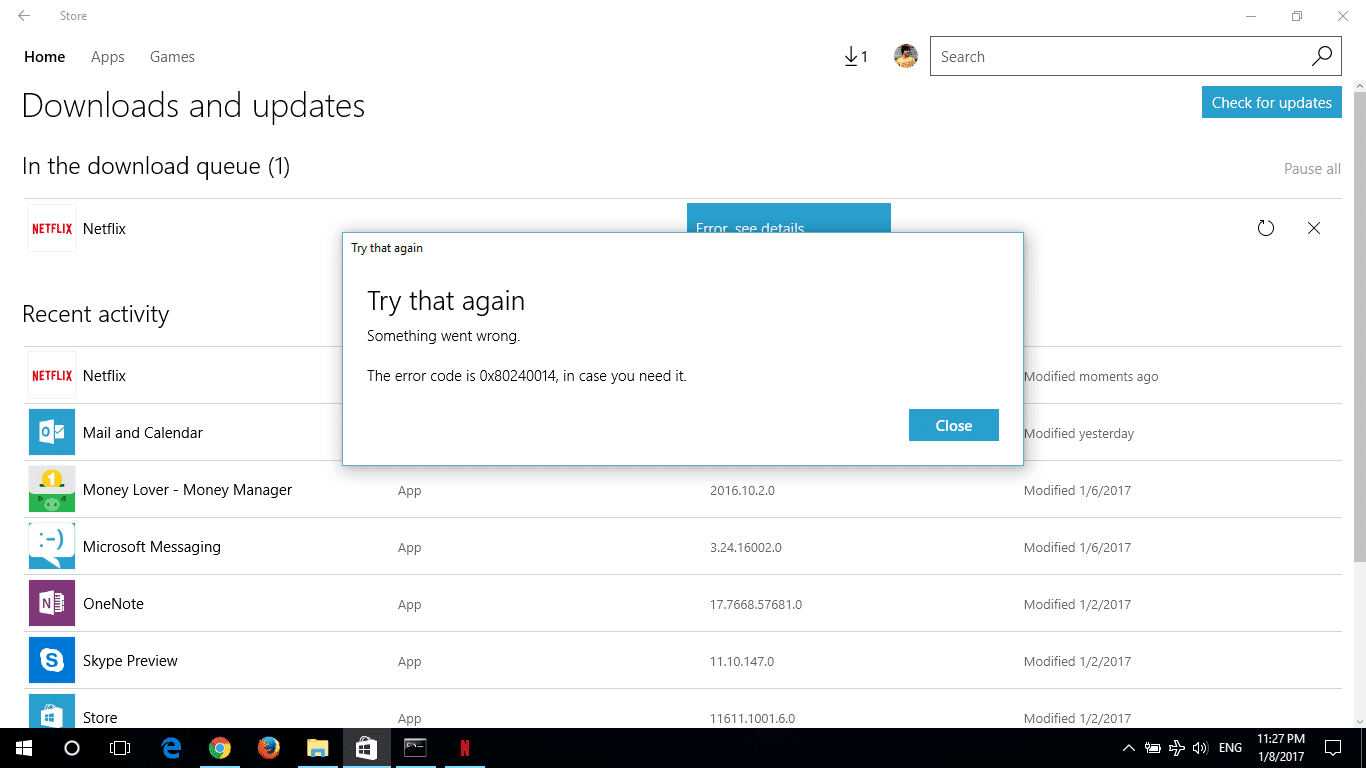
When you try to install any app from windows store in your windows 10 or 8.x PC, You may encounter some common problems. Error 0x80240014 is one of them. Recently, So many users have reported this error. Peoples face it more when they try to install / reinstall netflix. It also may happen with any other apps. In this article, I’ll introduce some troubleshooting methods that may help to fix error 0x80240014.
Normally, This error happens when windows fails to recognize the app installation. Luckily, You can get rid of this problem very easily.
Fix Error 0x80240014 in Windows Store:
We will follow several methods. But, Surely, The first one is the best solution for this error. I found it in Microsoft Community.
1. Fix from Application Folder
In most cases, This method fixes error 0x80240014. In fact, Your app installation may be successfully done. But, Windows store may not recognize it properly. In that case, You can see such error message. You should find it in windows universal application folder. If you open it from there, It will fix windows store error 0x80240014. Follow these instructions:
- At first, Open RUN by pressing Win + R.
- Now, Type shell:AppsFolder and hit Enter.
- It will open the application folder. Find the app you were trying to install and open it. Suppose, You are trying to install Netflix. Just find it in the folder and open it. This should not have any problem. You can use this app normally and you should see it in your app list in start menu.
- Now, Open Windows store and try reload the installation. Then, Store will recognize this app is already installed and it will remove error 0x80240014.
2. Reset Windows Store:
The most windows store errors should be fixed, If you reset it. If the first method doesn’t help you, I recommend try that again. If you give up, Reset windows store. To do it –
- Open RUN.
- Type wsreset and hit Enter.
3. Use Troubleshooter:
You also can use windows store app troubleshooter to fix error 0x80240014. To do it, Simply follow these things:
- Open Start Menu and type troubleshooting and hit Enter.
- Now, Click on View all.
- Then, Find windows store apps and open it.
- Follow onscreen instructions.
- It should resolve error 0x80240014.
If you know any additional methods, You can share in comment box.
Available link for download
Friday, February 17, 2017
How to Take Screenshot on Windows
How to Take Screenshot on Windows

A Screenshot is an image which is taken of anything displayed on your screen. Here, in this article, we will tell you various methods of taking a screenshot in Windows.
You can easily take any screenshot on different platforms, and same applies for Windows. It comes with an in-built option that works great in case of basic tasks, but there are many third-party programs that provide more features and ease of use.
#1: Taking Screenshots with Print Screen (PrtScn)
On the keyboard, Print Screen button is there which can take a screenshot and save it as a file, or take a screenshot without copying it in a file or even take a screenshot of just one window instead of the whole screen. This print screen buttons can be labeled as “PrtScn”, “PrntScr” or anything similar. In the case of most of the keyboards, this buttons is usually found between F12 and Scroll Lock. When you press this key, a screenshot is saved to the clipboard.
Saving Screenshot as a File
By pressing “Windows logo key + PrntScn,” you can save a screenshot. For tablets, and laptops you may have to press different buttons which would be mentioned in the manual that comes along with them.
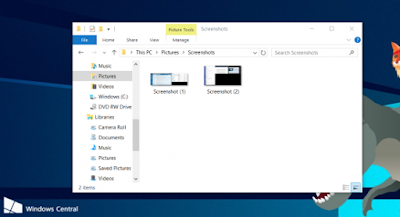
The screen will get dim for few moment and then a screenshot will appear as a file in a folder which is entitled as Screenshots, present inside your “Pictures” folder. The screenshot will be labeled with a number all by itself.
Taking Screenshot Without Saving
By pressing the “PrtScn” key, a screenshot will be copied to the clipboard. Then you have to open any image editor or word file where you wish to use the image. By choosing Edit>Paste, you can paste the screenshot at the place of your choosing. The dimensions of this image will be same as that of your desktop resolution. In some cases, the buttons need to be pressed may be different. So it is better to see the manual to know about saving this screenshot.
Taking Screenshot of Only One Window
First, you have to click on the title bar of the window which you wish to capture. Then you have to press “Alt + PrtScn”. A screenshot of your current window which is active will be copied to the clipboard. Then you have to paste that image into your favorite image editor. Similar to other screenshot method, the required keys to be pressed may vary from computer to computer, so it is better to take help of a manual that comes with your computer.
#2: Taking Screenshots with Snipping Tool
The Snipping tool has been part of the Windows for quite a long time. This tool was introduced in Windows Vista, and it remains the same. This tool can easily take screenshots of any open window, a rectangular area, or a free-form are or even the entire screen. You can easily annotate your snips with various colored pens or even a highlighter and then save it as an image or email it to your friend.
In the case of Windows Vista 7 and 9, you won’t be able to capture screenshots that consist of mouse movements. In Windows 10, snipping tool comes with a “Delay” option which will provide you the ability to capture screenshots pop-up menus and even tooltips. By opening the Snipping tool, you then have to click on Delay. From a drop-down list, you have to click on the number of seconds you wish to wait until your screenshot is duly taken.
Now you have to select which type of snip you wish to make by clicking the arrow next to “New”. You can also choose any of the four types of snip, namely, free-form, window, rectangular, and full screen.
Unlike a regular snip, the screen won’t fade out immediately. Instead, you will have whole 1 to 5 seconds depending on the delay you prefer, to set up your screenshots. You can also use this time to open pop-up menu or tooltip you wish to capture. After the time has elapsed, the screen will freeze and fade out so that you can take a snip.
#3: Using Keyboard Shortcuts along with Game Bar in Windows 10
Almost all of the Windows 10 comes with game DVR capabilities, in order to record gameplay footage along with taking screenshots of Windows PC games. The Game Bar creates a screenshot in PNG format and then save the file in “C:Users[ username]VideosCaptures.”. Before starting to use this Game bar, you have to launch the Xbox app which comes with Windows 10 open its settings. Under the “Game DVR”, you can toggle to “Take screenshots using Game DVR” and assign any keyboard shortcut you wish to make.
To make a screenshot, you have to press the keyboard combination “Windows key + G” in default case and then click on the “Yes, this is a game” box when it is prompted. Now after this, you have to press the “Camera icon” or “Win + Alt + PrtSCn” to take any screenshot.
#4: Taking Great Screenshots with Snagit
All the above-mentioned Windows’ in-built methods come with their pros and cons. If you wish to take a lot of screenshots and more flexibility than the in-built tools, you can certainly choose a third-party tool.
If you wish to buy a tool, then Snagit by Techsmith is one of the best tools that makes the task of taking a screenshot, quite easy. It comes with lots of features that allow you to target any specific window, take region snapshot and even capture the entire text of scrolling windows like different web pages.
With this, we end our list of various methods to take screenshots. Do let us know, which method you liked the most and also mention your reviews and suggestions in the comment section below. We are eagerly waiting for your views and in case you have any other method, then let us know.
Available link for download
Friday, February 3, 2017
Tutorial–Como deixar seu Android com aparêcia do Windows 10
Tutorial–Como deixar seu Android com aparêcia do Windows 10

essa é uma dica muito simples e bem bacana.

Você pode deixar seu Android igual ao Windows 10 de maneira rápida e simples…
_Symbian^3_Signed-0")
Tutorial:
1º passo: vá em configurações e depois va em segurança e marque a opção”Fontes desconhecidas” (só faz este passo se for baixar pelo servidor externo)
2º passo: baixe o APP
3º passo: abra e va rolando para o lado para pular o mini tutorial, em seguida ele irá te mostrar como se configura
Downloads:
MirrorCreator – WP Launcher
Google Play – WP Launcher
creditos: EuSouandroid.
Available link for download
Monday, January 30, 2017
Windows 7 SP1 with Update x86 x64 AIO 26in1 7601 23615 v16 12 20 Free Download
Windows 7 SP1 with Update x86 x64 AIO 26in1 7601 23615 v16 12 20 Free Download

Windows 7 SP1 with Update (x86-x64) AIO [26in1] By adguard
Software Version: 6.1.7601.23615 / v16.12.20
assembly Author: Adguard
Language: English, Russian
Size: 3.1 GBLegalization: require activation!
(for personal testing, use alternative means of activation)
(for personal testing, use alternative means of activation)
System Requirements:
* Processor: 1 gigahertz (GHz) or higher.
* RAM: 1 gigabyte (GB).
* Free space on hard drive: 16 gigabytes (GB).
* Graphics card: graphics device Microsoft DirectX 9 or later.
Description:
The assembly is made on the basis of the original image from MSDN. Were integrated into languages: English, Russian and updating to 13 December 2016. It is possible to set both out of the BIOS, and out of the system.
Checksums:
ru_windows_7_sp1_with_update_7601.23615_aio_26in1_v16.12.20_by_adguard.iso-en
the CRC-32: f37f0841
the MD4: 9032ef24ef311c91308beb759bbbb720
the MD5: d31e940cede04ea8af4ec98dcf0216f3
the SHA-1: dfae3556afba90c040f8f073a967c3a2b4ce988c
the CRC-32: f37f0841
the MD4: 9032ef24ef311c91308beb759bbbb720
the MD5: d31e940cede04ea8af4ec98dcf0216f3
the SHA-1: dfae3556afba90c040f8f073a967c3a2b4ce988c
Composition of assembly:
ru_windows_7_sp1_with_update_7601.23615_aio_26in1_v16.12.20_by_adguard.iso-en
the Windows 7 Starter (32-bit) - English
Home Basic, the Windows 7 (32-bit) - English
the Windows 7 Home Basic (64-bit) - English
the Windows 7 Home Premium (32-bit ) - English
the Windows 7 Home Premium (64-bit) - English
the Windows 7 Professional (32-bit) - English
the Windows 7 Professional (64-bit) - English
the Windows 7 Professional VL (32-bit) - English
the Windows 7 Professional VL ( 64-bit) - English
the Windows 7 Ultimate (32-bit) - English
the Windows 7 Ultimate (64-bit) - English
the Windows 7 Enterprise (32-bit) - English
the Windows 7 Enterprise (64-bit) - English
the Windows 7 Starter ( 32-bit) - Russian
the Windows 7 Home Basic (32-bit) - Russian
the Windows 7 Home Basic (64-bit) - Russian
the Windows 7 Home Premium (32-bit) - Russian
the Windows 7 Home Premium (64-bit) - Russian
Windows 7 Professional (32-bit) - Russian
Windows 7 Professional (64-bit) - Russian
Windows 7 Professional VL (32-bit) - Russian
Windows 7 Professional VL (64-bit) - Russian
Windows 7 Ultimate (32-bit) - Russian
the Windows 7 Ultimate (64-bit) - Russian
the Windows 7 Enterprise (32-bit) - Russian
the Windows 7 Enterprise (64-bit) - Russian
Main features:
- Integrated update on December 13, 2016;
- Integrate language packs: English, Russian;
- Cleaned folder: WinSxS ManifestCache;
- The systems were not in audit mode.
All changes made by standard Microsoft tools.
- Integrate language packs: English, Russian;
- Cleaned folder: WinSxS ManifestCache;
- The systems were not in audit mode.
All changes made by standard Microsoft tools.
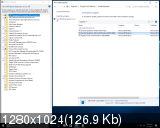
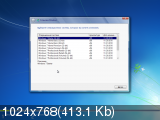
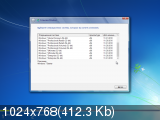
Screenshots:

Available link for download
Subscribe to:
Posts (Atom)