Showing posts with label fix. Show all posts
Showing posts with label fix. Show all posts
Friday, March 10, 2017
How to Fix Start Menu Search not Working Not Showing Results
How to Fix Start Menu Search not Working Not Showing Results
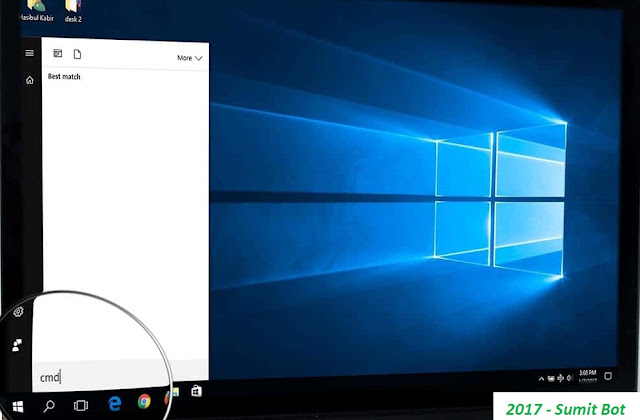
Start Menu search is an older feature which is available in all windows versions like XP, Vista, 7, 8 etc. But, In Windows 10, Microsoft has introduced a search box in taskbar. It is actually integrated with Cortana. Users from cortana unsupported countries don’t have this search box on taskbar. They can open start menu and type anything to search. But, Sometimes, Start menu search may not go through right way. In this article, I’ll guide how to fix start menu search not working problem.
Normally, When you type anything in start menu, It should show you the instead results. But, When there is something wrong, It won’t show you anything. As a result, You may face a little inconvenience to find anything quickly. Sometimes, This may hamper your regular works. The users who already have faced this problem, They are surely looking for a good solution. But, Everyone should know the ways to resolve this problem.
There may be many reasons behind this issue. Third-party programs specially the PC optimizers and antivirus, corrupted system files and services etc. can cause this problem. It also can be a result of your hard disk problem. So, In order to fix start menu search problem, We may need to solve these issues.
How to Fix Start Menu Search not Working Properly:
Before starting repairing steps, You should restart your PC and see if it resolves the search issue. Anyway, Here are the most working methods that can help you.
1. Start / Restart Windows Search Service:
Sometimes, Windows search service may stop working for any unexpected reasons. Restarting this service can fix any search related issues. Again, You may disable it by mistake. In that case, You may need to enable it. All of these things can be done very easily. Here are the instructions.
- At first, Open RUN. You can press Win + R to launch it.
- Now, Type services.msc and click on OK or hit Enter.
- In new window, You will see a list of services. From there, Find Windows Search and double click on it. This will open its properties.

- Now, Click on Stop and then click on Start.
- Then, Set Startup type as Automatic.
- Now, Try to search anything and see if it “fixes start menu search not working problem” or not.
- If it doesn’t resolve the problem, Restart your PC and check again.
2. Tweak Cortana Language Settings:
It may seem weird. But, This method worked for me. So, I’m adding it in this article. When you encounter this search problem, You should try to change your language to anything else and then change back to it in previous one. To do it, You have to follow these steps.
- Click on taskbar search box or type anything in start menu search. You should should see a setting icon at the bottom left corner. Just click on it.

- Now, Scroll down and find language options.
- Change language and try searching anything.
- It should fix start menu search not showing results problem.
3. End Search and Cortana Process:
This is another best working solutions to repair start menu search problem. Restarting Search or cortana can help us. But, There is no direct option to do it. So, We will play a little trick. As search / cortana process starts automatically, We will end this process from task manager. So, It will work like restarting cortana. Here are instructions.
- Right click on Taskbar and choose Task Manager.
- Now, Try to find anything like these “Search and Cortana Application”, “Cortana background task”, “Cortana” or “Search” etc.
- Just right click on the service and click on End task.
- Now, Try to search anything from start menu and see if it works.
4. Follow Some Other Methods from Another Article:
Previously, I have published an article on taskbar search and cortana issue. The methods described there are also useful for start menu search problem. So, You can follow the uncommon methods from there in order to solve start menu search not working / showing results. Read: Fix Cortana and Taskbar Search not Working
5. Use Disk Defragment:
When your hard disk become extremely fragmented, It performs very slowly. You should know that hard disk speed is a key factor of windows or any operating systems performance. For this problem, Windows start menu search may not show any results or may show results very slowly. In that case, Built-in disk optimizer tool can help you.
- Open Run, Type dfrgui and hit Enter.
- Now, Select disk drive and click on Optimize.
- It may take a few minutes to 1 or 2 hours to complete the task.
After doing it, You should not longer face start menu search not working problem.
6. Repair Hard Disk Problem:
I hope, This article will help you in order to get rid of start menu search not showing results problem. You can comment below to know or suggest anything related to this topic.
Available link for download

Tuesday, March 7, 2017
How to Fix Error 0x80240014 in Windows Store
How to Fix Error 0x80240014 in Windows Store
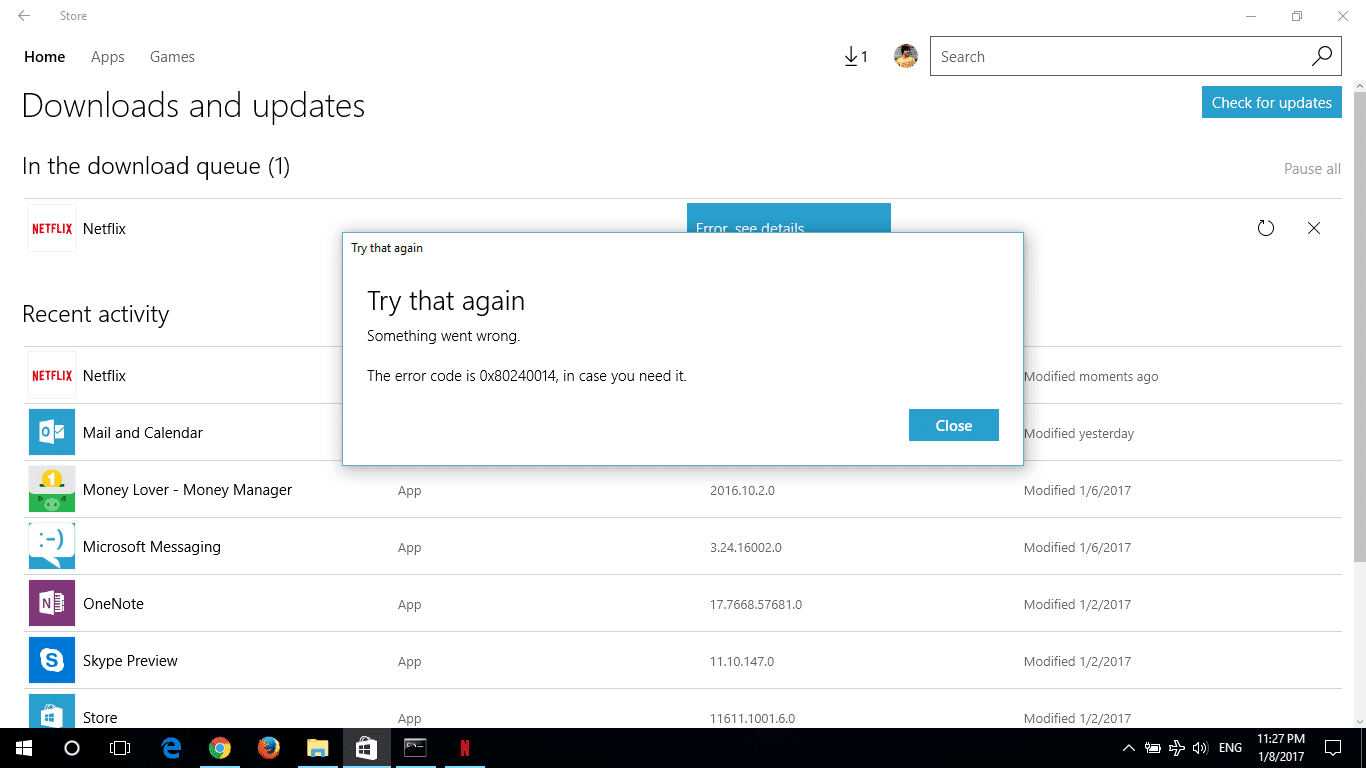
When you try to install any app from windows store in your windows 10 or 8.x PC, You may encounter some common problems. Error 0x80240014 is one of them. Recently, So many users have reported this error. Peoples face it more when they try to install / reinstall netflix. It also may happen with any other apps. In this article, I’ll introduce some troubleshooting methods that may help to fix error 0x80240014.
Normally, This error happens when windows fails to recognize the app installation. Luckily, You can get rid of this problem very easily.
Fix Error 0x80240014 in Windows Store:
We will follow several methods. But, Surely, The first one is the best solution for this error. I found it in Microsoft Community.
1. Fix from Application Folder
In most cases, This method fixes error 0x80240014. In fact, Your app installation may be successfully done. But, Windows store may not recognize it properly. In that case, You can see such error message. You should find it in windows universal application folder. If you open it from there, It will fix windows store error 0x80240014. Follow these instructions:
- At first, Open RUN by pressing Win + R.
- Now, Type shell:AppsFolder and hit Enter.
- It will open the application folder. Find the app you were trying to install and open it. Suppose, You are trying to install Netflix. Just find it in the folder and open it. This should not have any problem. You can use this app normally and you should see it in your app list in start menu.
- Now, Open Windows store and try reload the installation. Then, Store will recognize this app is already installed and it will remove error 0x80240014.
2. Reset Windows Store:
The most windows store errors should be fixed, If you reset it. If the first method doesn’t help you, I recommend try that again. If you give up, Reset windows store. To do it –
- Open RUN.
- Type wsreset and hit Enter.
3. Use Troubleshooter:
You also can use windows store app troubleshooter to fix error 0x80240014. To do it, Simply follow these things:
- Open Start Menu and type troubleshooting and hit Enter.
- Now, Click on View all.
- Then, Find windows store apps and open it.
- Follow onscreen instructions.
- It should resolve error 0x80240014.
If you know any additional methods, You can share in comment box.
Available link for download
Thursday, January 26, 2017
Best Ways to Fix Windows Wi Fi Disconnecting Problem
Best Ways to Fix Windows Wi Fi Disconnecting Problem

Probably, You have Wi-Fi router in your home. So, You can easily access internet from your tab, smartphone and notebook. If you have a desktop PC without Wi-Fi receiver availability, You may be using ethernet connection. However, Have you ever experienced “frequent disconnection from Wi-Fi or ethernet network” problem? For Windows 10, 8 and 7 users, The answer is probably yes. But, It has easy solutions. You can simply fix wi-fi network frequent disconnection problem.
Normally, This types of problems occur more in old laptop computers. It is because of the hardware failure. In that case, You won’t have much to do. But, If you are facing similar problems in newly bought or a good notebook / laptop or tab, It will be real problem. You may keep facing this wi-fi network keeps disconnecting problem. In that case, You will have to give your effort to resolve this unexpected issue.
How to Fix Windows Keeps Disconnecting from Wi-Fi Problem:
Okay, It’s time to do something to prevent wifi disconnecting issue in your windows 10, 8 or 7. Here are some methods which are reportedly known as working solutions.
1. Check for Latest Driver Update:
It is the first method that you should try to resolve any problems that may be a result of driver incompatibility. Updating your Wi-Fi driver can solve all incompatibility issues which may fix PC keeps disconnecting from WiFi problem. To update it, You can do following things.
- At first, Press Win + R, Type devmgmt.msc and press Enter. It will open device manager.
- Then, Expand Network Adapters.
- Now, Right click on the WiFi driver and select Update Driver Software.
- Then, Choose Search automatically for updated driver software.
- Follow on screen instructions.
- You also should do it for other network adapters and restart your PC.
- Now, You should find Windows keeps disconnecting from wifi problem has been fixed.
2. Modify Power Settings:
This is our second effective method to solve frequent wifi disconnecting issue in windows computers. For laptops or notebooks, Windows has power plan feature. Which works to save battery life which is also an important thing. But, Sometimes, It may have a bad effect. You may not get full performance from your PC, If you have battery saver or balanced mode enabled. High Performance plan is the way to get full from your PC. But, It can significantly drain your battery. However, In high performance mode, You may have less chance to randomly experience windows keeps disconnecting from wifi. If you don’t feel comfortable with it, You can do another thing. Just, Disable battery saver functionality in wifi driver. It may fix any wifi disconnecting issues in windows 10, 8 or 7.
Here are the instructions you can follow.
- Just open Windows Device Manager like method 1.
- Then, Double click on your wi-fi adapter.
- Open Power management tab.

- Uncheck Allow this computer to turn off this device to save power.
- Click OK and Restart your PC.
- From now, You should not face disconnecting issue on wifi.
3. Disabling / Enabling Wireless:
This can be a temporary solution to fix wifi disconnecting issue in windows. Just, Follow these things:
- First of all, Disconnect from Wi-Fi.
- Then, Press Win + R to open RUN.
- Now, Type ncpa.cpl and hit Enter.
- After that right click on your Wireless adapter and then choose Disable.
- Again, Right click on it and click on Enable.
- Most of the laptops or notebooks have function key to enable or disable wireless connectivity. You also can use that.
- Now, See you are not facing problem anymore.
In fact, This is a temporary solution to fix windows frequent wi-fi disconnecting problem. So, You should not rely upon only this method. Do follow next.
4. Reset TCP/IP Stack:
Now, Another thing you can do is resetting TCP/IP Stack and autotuning. In lenovo support site, I found this method. It also can help regarding this wifi disconnecting issue. You can use some commands to do this.
- At first, Press Win + X from keyboard.
- Now, Choose Command Prompt (Admin).
- Then, Run the following commands.
NETSH INT IP RESET C:RESTLOG.TXTNETSH INT TCP SET HEURISTICS DISABLEDNETSH INT TCP SET GLOBAL AUTOTUNINGLEVEL=DISABLEDNETSH INT TCP SET GLOBAL RSS=ENABLED
- Restart your computer to complete this process.
- It should fix windows Wi-Fi disconnecting problem in your laptop/notebook.
5. Reset Connection:
If problem still exists, You can reset your connection settings by using some commands. It is very useful to troubleshoot any internet connectivity problems.
- Open Command Prompt as administrator like previous method.
- Then, Type the following commands and hit enter for each.
netsh winsock reset
netsh int ip reset
ipconfig /release
ipconfig /renew
ipconfig /flushdns
- Now, Check, If it helps to fix windows keeps disconnecting from Wi-Fi.
6. Disable IEEE 802.1X Authentication
Sometimes IEEE 802.1X authentication can cause frequent / repeatedly Wi-Fi disconnecting issue in Windows or any other operating systems. So, You can try disabling this feature and see if it fixes the problem. Here are the instructions to disable it.
- First of all, Open RUN, Type ncpa.cpl and click on OK. It will open network connections.
- Now, Right click on your wireless connection and choose properties.
- Then, Click on Configured.
- Now, Disable 802.1X Authentication.
Note: You may not find this option. But, There may be similar options available. Just try disabling it and see if it helps.
7. An Weird Method to Fix Windows Wi-Fi Disconnecting Issue:
It is really an weird method. So, I have put it at last. If you are using windows 10 or 8.x, Just enable airplane mode. Then, Only enable Wi-Fi. Except this all other wireless connectivity like bluetooth will remain disabled. For some users, It worked great. They know more face wifi disconnection problem.
If you still encounter this problem, I would like to try to run SFC or DISM Command. If problem exists even after resetting windows, It may be an issue of hardware or your router. Try troubleshooting your router.
I hope, These tricks will be helpful for you to fix randomly wi-fi disconnecting problem in windows.
Available link for download
Subscribe to:
Posts (Atom)